Arachni scanner에서 Webhook으로 Slack 연동하기(Send msg to slack when arachni scan is complete)
Arachni는 성능 좋은 웹 취약점 스캐너임과 동시에 CI/CD 및 확장성이 굉장히 좋습니다. Web-UI, REST Server , RPCd, Cli, Interactive Shell 지원하는 것만 봐도 개발자가 엄청 신경썼다는게 느껴지지요. Arachni is powerful scanner of universe.

스캔이 완료됬을 떄 노티를 받을 수 있으면 참 좋은데, Arachni에서는 플러그인으로 Email 과 Webhook 2개를 지원해줍니다. Webhook이 있다면.. 이미 모든 서비스는 연동할 수 있는 상태이지요. arachni can receive results when scanning is complete through email and webbook plug-ins.
(예전엔 코드를 직접 커스텀해서 사용했던지라 리포트 생성단계에서 별도로 요청을 보냈던거 같네요..)
아무튼 오늘은 간단하게 Arachni의 webhook notify를 통해 slack으로 메시지를 전달하는 방법에 대해 정리해보죠. Today is the how to arachni notify message to slack with webhook.
Make Slack Webhook
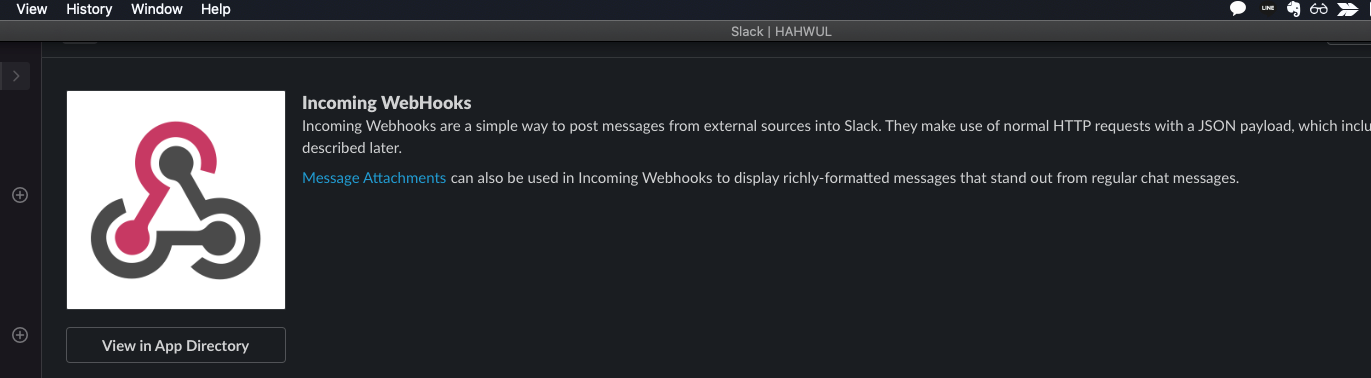
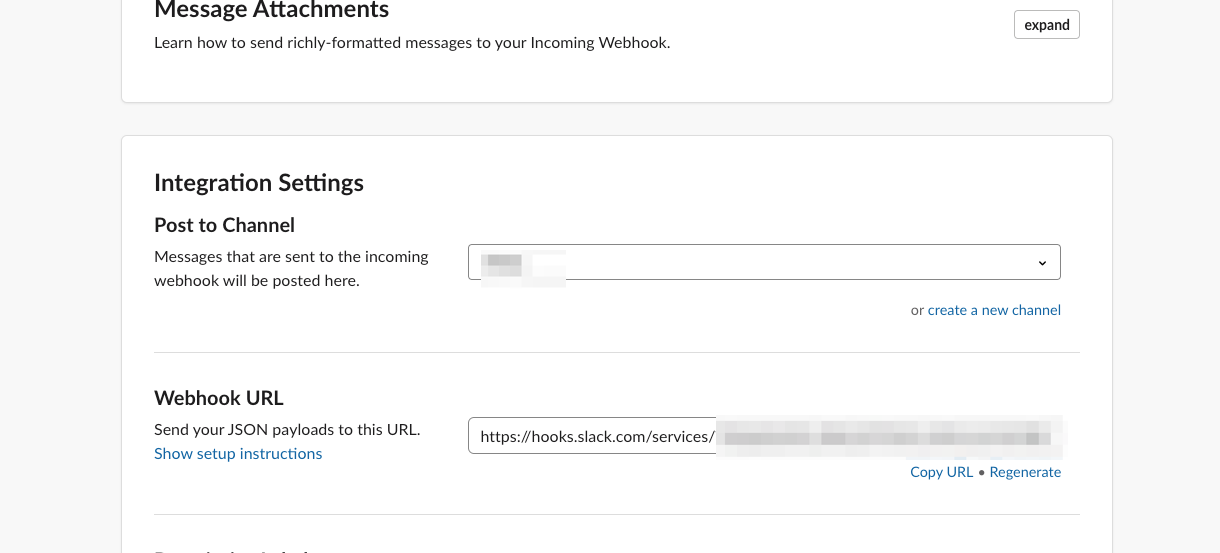
Slack에 들어가셔서 incoming webhook을 적용해줍니다. Slack 무료 플랜이 10개까지인가 쓸 수 있는데, 확장성을 고려하면 incoming, outgoing webhook 2개는 무조건 필수로 생각됩니다. First, Go to the Slack and apply incoming webhook.
 |
|---|
| Add Incoming Webhooks on Slack |
 |
|---|
| Setting Webhook and copy Webhook URL |
생성 이후 Web Hook URL 복사해둡니다. (미리 쓰고 계셨다면 기존 URL을..)
And.. Copy WebHook URL
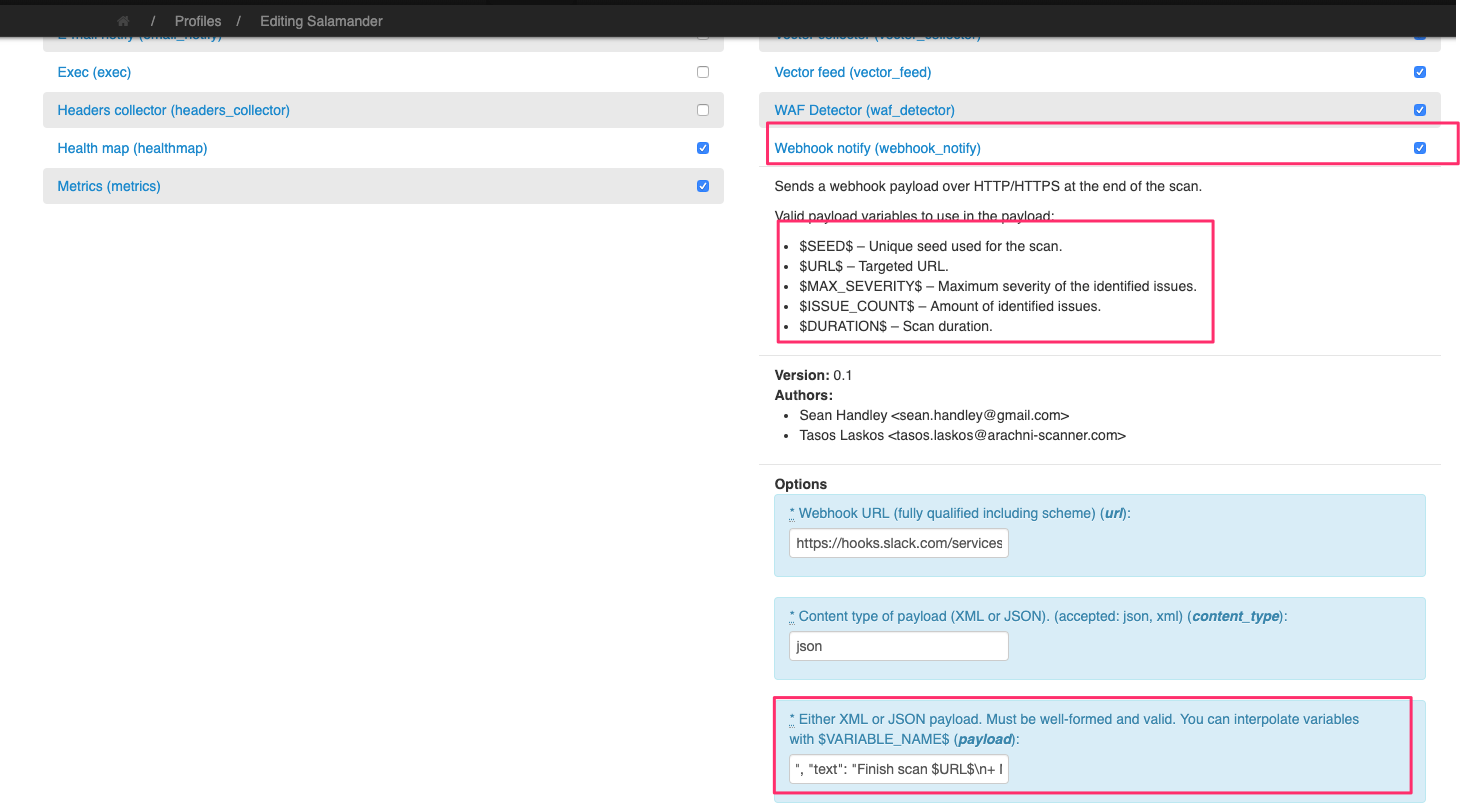
Add(edit) Profile for Webhook notify Plugin
이제 Arachni의 Scan Profile을 변경해주어야 하는데요, Web-UI 기준으론 아래 경로에 있습니다.
New(or Edit) Profile > Plugins > Webhook notify (webhook_notify)
Let’s approach the path above and modify the profile.
플러그인쪽에 Webhook notify 추가하면 몇가지 데이터를 작성하는 부분이 나타납니다. 여기서 미리 Arachni에 정의된 변수들을 쓸 수 있는데, 아래와 같습니다. When you add a Webhook plugin, you will see some data. Here you can write the variables defined in Aracini in advance, as shown below.
Sends a webhook payload over HTTP/HTTPS at the end of the scan.

Valid payload variables to use in the payload:

$SEED$ – Unique seed used for the scan.
$URL$ – Targeted URL.
$MAX_SEVERITY$ – Maximum severity of the identified issues.
$ISSUE_COUNT$ – Amount of identified issues.
$DURATION$ – Scan duration.
(첨에 이걸 링크 안보고 테스트하다가 고생좀 했네요..)
아무튼.. 형식에 맞게 데이터를 넣어보면.. URL
Your hook url
Type
json
Payload
{"channel": "#your_channel", "username": "your_arachni_name?", "text": "Finish scan $URL$\n+ Max Severity: $MAX_SEVERITY$\n+ Found Issues: $ISSUE_COUNT$\n+ Seed: $SEED$", "icon_emoji": ":dragon_face:"}
요런 형태가 됩니다.
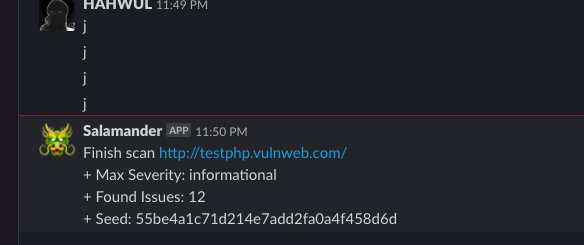
Shall we try?
test now!
 |
|---|
| run arachni scanning and when finish.. |
 |
|---|
| Notify to slack |
Slack에 Report URL 추가하기
Slack에 받은 데이터에서 바로 Report를 열고 싶은 경우가 있습니다. 이 때 우리가 중요하게 봐야할 SEED 값입니다. Web-UI에선 사용되지 않는 값이지만, 이 값은 실제 스캔 건에 대해 Key 값이며, REST API에서 scan을 식별하는 주요 키 값으로 쓰입니다. You may want to open the Report directly from the data you received in the Slack. And that’s the SEED that we need to look at as important. This value is not used in the Web-UI, but it is the key value for the actual scan case and is used as the main key value to identify scan in the REST API.
REST API 문서를 보면 Report쪽은 아래와 같이 정의됩니다. Defines the Report page as follows:
GET /scans/:id/report
GET /scans/:id/report.json
GET /scans/:id/report.xml
GET /scans/:id/report.yaml
GET /scans/:id/report.html.zip
여기서 :id 값은 위에서의 SEED 값이며, 이를 활용하면 이런 URL을 만들 수 있습니다.
The value of :id is the SEED value above, and you can make report API url.
http://your-arachni-rest-server/scans/$SEED$/report.html.zip
요 내용이 Webhook notify에 들어간다면 아래처럼 치환되겠죠.
http://your-arachni-rest-server/scans/cb6881995df794f82bad153425ecc602/report.html.zip
압축은.. REST API를 그냥 쓴다면 어쩔 수 없는 부분입니다. 코드를 수정해서 최종 리포트 생성 이후 또는 리포트 요청 할 때 강제로 압축 풀도록 하면 좋습니다 :)
